
Android Developer Options: Hidden Features & Safe Settings Guide
How to enable Android Developer Options and safely use animation scales, USB debugging, Force Dark and Background Process Limit
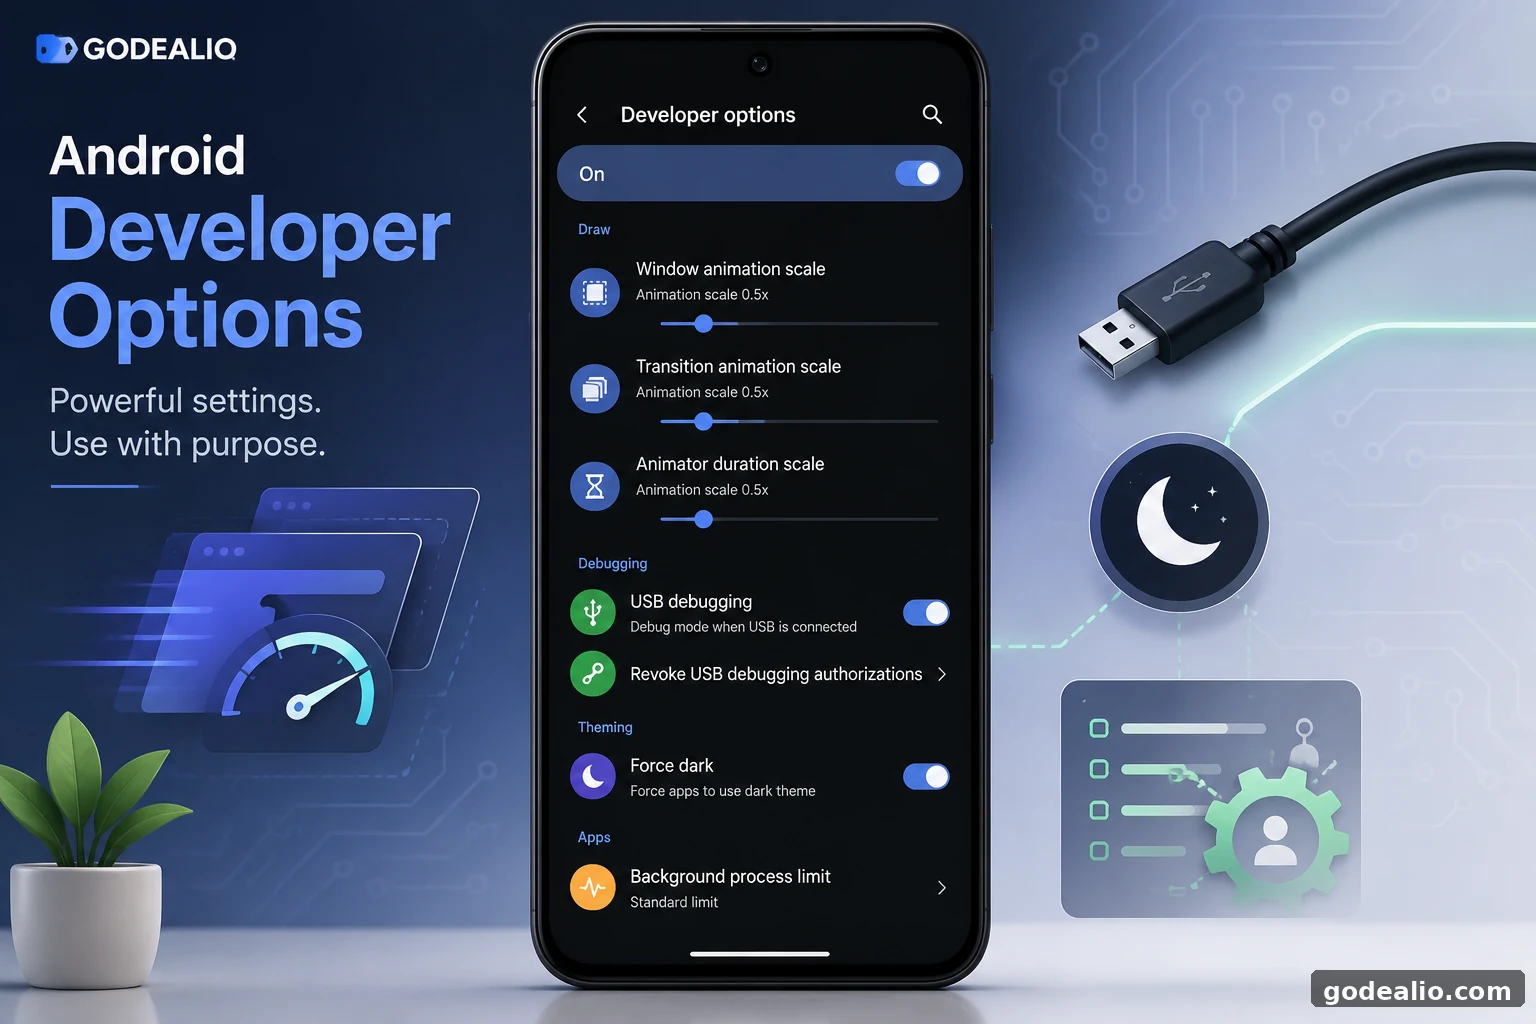
Android Developer Options unlock useful Android hidden settings for animation speed, USB debugging, Force Dark and Background Process Limit. Learn how to enable Developer Options Android users can access, including Android animation scale 0.5x controls and Samsung Developer Options, and use these advanced settings safely.
Quick Verdict
Guide Overview
- Guide type
- how-to
- Difficulty
- intermediate
- Market
- India
- Time required
- Approximately 2-5 minutes to enable Developer Options and adjust a specific setting.
- Cost estimate
- No additional cost
Who this guide is for
Android users in India who want to enable Developer Options, understand hidden Android settings and use advanced controls safely
Before You Start
Requirements
- An Android phone with access to the Settings app
- Access to the device's About phone or equivalent device-information section
- The phone's screen-lock credentials when authentication is requested
Prerequisites
- Know how to navigate the Settings app on your Android phone.
- Have your screen-lock PIN, password or pattern available if authentication is requested.
- Understand that Developer Options menu names, locations and available controls can vary between Android versions and manufacturers.
- Decide which Developer Option you actually need before changing advanced settings.
Tools Needed
- Android phone
- Computer and suitable USB connection only when using features such as USB debugging that require a computer-based workflow
Requirement Details
Android Settings access
RequiredDeveloper Options is enabled from the device Settings application by locating the Build Number entry.
Official documentationScreen-lock credentials
OptionalSome devices request the current PIN, password or pattern while Developer Options is being enabled.
Computer
OptionalA computer is not required to enable Developer Options, but it may be required for workflows involving USB debugging, Android Studio, ADB or other supported development tools.
Official documentationStep-by-Step Guide
Follow the relevant steps in order and avoid changing unrelated advanced settings.
Open Android Settings
- Open the Settings app.
- Navigate to About phone, About device or the equivalent device-information section.
- Remember that the exact menu name can vary between manufacturers and Android versions.
Expected result
You should reach the area containing information about the phone and its software.
Platform: Android
Find Build Number
- Open the device-information section.
- Locate Build Number.
- On supported Samsung Galaxy devices, open Settings, About phone, Software information and then locate Build number.
- Other manufacturers may place Build Number in a different location.
Expected result
Build Number should be visible and ready to be tapped.
Platform: Android
Tap Build Number Seven Times
- Tap Build Number seven times.
- Complete screen-lock authentication if your device requests it.
- Wait for the confirmation that Developer Options has been enabled.
Expected result
Developer Options becomes available on the device.
Warning
Developer Options exposes advanced system controls intended primarily for development, debugging and testing.
Platform: Android 4.2 and higher
Open Developer Options
- Return to the previous Settings screen or main Settings menu.
- Locate Developer Options.
- Open the menu.
- Be aware that its location or name can vary between devices.
Expected result
The Developer Options screen should display advanced Android configuration and debugging controls.
Warning
Avoid changing unfamiliar settings without understanding their purpose.
Platform: Android
Adjust Animation Scales
- Open Developer Options.
- Locate Window animation scale.
- Select a lower scale such as 0.5x if available on your device.
- Locate Transition animation scale and select 0.5x if available.
- Locate Animator duration scale and adjust it if you want shorter animations.
- Use the phone normally and evaluate whether you prefer the change.
Expected result
Interface animations and transitions should complete more quickly, which can make the phone feel more responsive.
Warning
Animation settings do not upgrade the processor, RAM, storage or other phone hardware.
Platform: Android
Enable USB Debugging Only When Needed
- Open Developer Options.
- Locate USB debugging.
- Enable it when your development, debugging or supported computer-based workflow specifically requires it.
- Follow the instructions provided by the development or debugging tool you are using.
- Disable debugging when you no longer need the workflow if appropriate for your use case.
Expected result
The phone becomes available for supported USB-based debugging and development workflows after any required device authorization is completed.
Warning
Do not enable debugging simply as a performance tweak; it is a development and diagnostic feature.
Platform: Android
Understand Force Dark
- Treat Force Dark as a compatibility and testing feature rather than guaranteed dark-mode support for every application.
- If an applicable Force Dark override is available on your device, enable it only when you specifically want to test forced dark rendering.
- Check affected applications after making the change.
- Reverse the setting if an application does not render correctly.
Expected result
Compatible applications or views may use automatically generated dark rendering.
Warning
Force Dark does not guarantee correct or identical results in every application.
Platform: Android 10 and supported implementations
Understand Background Process Limit
- Open Developer Options.
- Locate Background process limit.
- Review the choices available on your device.
- Change the setting only when you have a specific development, testing or troubleshooting reason.
- Evaluate application behaviour after making the change.
Expected result
Android applies the selected restriction to the number of background processes.
Warning
Restricting background processes can change how applications behave. Do not assume that a lower value is universally better.
Platform: Android
What Are Android Developer Options?
Android Developer Options is an advanced Settings screen containing controls designed for development, debugging, testing and device-behaviour analysis. It is also where users encounter several Android hidden settings, including animation controls, USB debugging Android tools rely on, graphics options and application-process controls. For users searching for Android Hidden Features - Developer Options is one of the most useful advanced menus to understand. On Android 4.2 and higher, the menu is hidden until it is enabled through the Build Number process. The exact location varies by Android version and manufacturer. This guide explains how to enable Developer Options Android phones provide, how Android animation scale 0.5x can shorten interface animations, what Force Dark Android support does, how Background Process Limit works, and where Samsung Developer Options can be found on supported Galaxy devices. These controls should be used for a specific purpose rather than treated as universal performance tweaks.
How to Unlock Developer Options on Android
To enable Developer Options Android users generally need to locate Build Number and tap it seven times. On supported Galaxy phones, Samsung Developer Options can be unlocked through the device's Software information screen. Google documents a seven-tap Build Number process for enabling Developer Options on Android 4.2 and higher. First locate Build Number in the device's Settings application. The exact path depends on the manufacturer. For Google Pixel phones, Google's documentation lists Settings > About phone > Build number. For Samsung Galaxy S8 and later, Google lists Settings > About phone > Software information > Build number. Samsung's own developer documentation also instructs Galaxy users to open Settings, About device or About phone, Software information and then tap Build number seven times. After the seventh tap, the device enables Developer Options. Some phones may request a screen-lock pattern, PIN or password during the process. Return to Settings and locate Developer Options. Its final location can also vary depending on the device.
Make Android Feel Faster with Animation Scales
Android animation scale 0.5x is a commonly used Developer Options setting when users want interface animations to finish sooner. Developer Options includes controls for Android's animation playback. Google documents Window animation scale as controlling window-animation playback speed and Transition animation scale as controlling transition-animation playback speed. A lower scale produces faster animation playback. If your phone provides a 0.5x option, changing animation scales from 1x to 0.5x makes animations finish sooner. This can make opening screens, moving between windows and navigating the interface feel more immediate. The distinction between perceived responsiveness and hardware performance is important. Changing an animation scale does not increase CPU speed, add RAM or improve storage performance. Android is simply spending less time displaying visual transitions. Users who prefer normal animation timing can restore the previous values at any time.
USB Debugging: When You Actually Need It
Android USB debugging is intended for supported development and diagnostic communication with a computer. USB debugging is intended for communication between an Android device and development tools running on a computer. Google's Android documentation describes debugging options that allow communication through Android development tools, including workflows involving Android Studio and ADB. This makes USB debugging useful for application development, testing and specific diagnostic workflows. It should not be confused with a phone-performance optimisation. Turning USB debugging on does not make Android faster. Enable USB debugging when the development or troubleshooting procedure you are following specifically requires it. If you are only changing animation speed or exploring ordinary Android settings, there is generally no reason to enable USB debugging as part of that process.
Force Dark and App Compatibility
Force Dark Android functionality is primarily a developer compatibility feature rather than guaranteed system-wide dark mode. Android 10 introduced Force Dark as a developer feature that can automatically apply dark rendering to compatible light-themed application views. Instead of requiring a complete native dark-theme implementation, Android can analyse views and apply dark rendering before they are displayed. Force Dark is not universally applicable. Android documentation explains that applications and themes can control whether Force Dark is allowed, and applications using an existing dark or DayNight theme may not have Force Dark applied. Google also recommends thoroughly testing applications when using the feature. For users who encounter a Force Dark override in Developer Options, this means the feature should be treated as an experiment rather than guaranteed dark-mode support. If an app already offers a native dark theme, that implementation is normally preferable because it was intentionally designed for the application's interface.
What Background Process Limit Actually Does
Background Process Limit Android controls are part of Developer Options and are used for restricting the number of processes allowed to run in the background at one time. Background Process Limit appears under the application-related section of Developer Options. Google's documentation describes it as a setting that controls the number of processes allowed to run in the background at one time. This feature is particularly relevant when developers want to observe how an application behaves under background-process restrictions. It should not automatically be treated as a general-purpose battery optimisation. Reducing the number of background processes can change application behaviour because apps may not remain available in the background in the same way. Google documents the available control but does not prescribe one universal Background Process Limit value for every Android device or user. Unless you are testing or troubleshooting a specific scenario, leaving normal Android process management unchanged avoids introducing unnecessary application-behaviour differences.
Other Developer Options You May See
Developer Options contains considerably more than the four settings highlighted in this guide. Google's official documentation describes debugging controls, bug-report tools, visual input feedback, GPU and hardware-accelerated rendering settings, monitoring tools, Bluetooth-related options, simulated displays and application-testing controls. The exact list available on your phone depends on Android version and manufacturer implementation. A setting appearing in Developer Options does not automatically mean it will improve everyday phone performance. Many options exist specifically so developers can reproduce conditions, diagnose applications or inspect rendering behaviour. For that reason, avoid copying lists of supposed Android speed tweaks and enabling multiple advanced settings without understanding their intended purpose. Use official Android or manufacturer documentation before changing an unfamiliar option.
How to Use Developer Options Safely
The safest way to use Developer Options is to start with a specific objective. If you want shorter interface animations, adjust animation scales. If a development tool requires USB debugging, enable that feature. If you are testing application behaviour under background restrictions, Background Process Limit is relevant. Change one option at a time and remember its previous value. This makes it much easier to determine which setting caused a behaviour change and to reverse it. Avoid enabling several settings together simply because an online optimisation guide recommends them. Developer Options is primarily a development environment rather than a collection of hidden performance upgrades. Some settings deliberately alter Android behaviour for testing purposes. Treating them as permanent optimisation switches can produce unexpected application or interface behaviour.
Which Developer Option Should You Use?
Choose Developer Options according to the task rather than enabling a collection of settings. If your goal is simply to reduce the time spent watching interface animations, the animation-scale controls are the most directly relevant options covered here. A lower scale results in faster animation playback. USB debugging belongs to development and troubleshooting workflows where a computer needs debugging communication with the Android device. Force Dark is useful primarily for testing automatic dark rendering on compatible applications and themes. Background Process Limit is useful when deliberately testing how applications behave with restricted background processes. These controls solve different problems. Enabling all of them together does not create a universal Android performance mode. Select only the setting that corresponds to what you are trying to accomplish.
What Results Should You Expect?
Each Developer Option has a different expected result. Lower animation scales shorten visual animation playback, making interface transitions feel faster without increasing underlying hardware performance. USB debugging enables supported debugging communication between the phone and development tools. Force Dark can automatically generate dark rendering for compatible light-themed application views, but application and theme configuration determines whether it can be applied. Background Process Limit restricts how many processes Android allows to remain in the background simultaneously. Evaluate each change against its intended purpose. If you reduced animation scales, judge whether you prefer the shorter transitions. If you enabled debugging, use it only for the required development workflow. Developer Options should be treated as targeted controls rather than a one-click performance optimisation system.
Best Practices for Using Developer Options
Developer Options is most useful when each change has a clear purpose. Before modifying an advanced setting, note its current value and decide what result you expect. After making the change, use the phone normally and evaluate only that specific behaviour. This makes it easier to determine whether the adjustment helped and prevents unrelated settings from being blamed for a new problem.
Avoid changing animation controls, background-process restrictions and debugging settings at the same time. A one-setting-at-a-time approach provides a clearer before-and-after comparison and makes it easier to restore normal behaviour if an application begins closing more often, rendering incorrectly or behaving differently in the background.
Developer Options should not be treated as a permanent performance preset. Many controls exist specifically for development, debugging, testing and reproducing unusual conditions. Keep only the settings that support an active task and leave unrelated controls unchanged. When menu locations differ between Android versions or manufacturers, use official Android or manufacturer documentation instead of assuming every phone follows the same path.
After completing a troubleshooting or development task, review the settings you changed and restore testing-only options that are no longer required. Keeping a simple record of the original values can make this easier. This approach lets you benefit from useful Developer Options while reducing the chance that an experimental setting remains enabled and unexpectedly changes normal application or system behaviour.
- Record the original value before changing an advanced setting.
- Change one Developer Option at a time.
- Evaluate the intended result before making another adjustment.
- Restore testing-only settings when they are no longer required.
- Use official Android or manufacturer documentation for device-specific behaviour.
Troubleshooting
Build Number is not visible directly under About phone
Likely causes
- The manufacturer places Build Number inside another device-information menu.
- Samsung Galaxy devices commonly place it under Software information.
- The path can differ depending on Android version and manufacturer.
What to try
- Check About phone or About device.
- Look for Software information or a similar software-details section.
- Use the manufacturer's documentation for the exact device if the standard path does not match.
When to escalate: Consult the device manufacturer's official support documentation if Build Number cannot be located.
Developer Options does not appear after tapping Build Number
Likely causes
- The seven-tap activation sequence was not completed.
- Required screen-lock authentication was not completed.
- Developer Options is located elsewhere in the device's Settings menu.
What to try
- Return to Build Number and complete the seven taps.
- Complete any requested PIN, password or pattern authentication.
- Search Settings for Developer options.
- Check the manufacturer's official instructions for your device.
When to escalate: Consult manufacturer support if the menu remains unavailable after completing the documented activation process.
The phone does not become significantly faster after changing animation scales
Likely causes
- Animation scales change visual animation playback rather than hardware performance.
What to try
- Use a lower animation scale if your goal is shorter transitions.
- Do not expect the setting to increase CPU, RAM or storage performance.
Force Dark produces incorrect colours or visual elements
Likely causes
- The application was not designed or tested for forced dark rendering.
- Force Dark compatibility depends on the application's theme and configuration.
What to try
- Disable the Force Dark override for normal use if rendering is incorrect.
- Use the application's native dark-theme option when available.
When to escalate: Application-specific visual issues should be handled by the application's developer or through native dark-theme support.
Unsure which Background Process Limit value to choose
Likely causes
- Android provides multiple choices but does not prescribe one universal recommended value.
What to try
- Leave the normal/default behaviour unchanged unless you have a specific testing or troubleshooting requirement.
- Do not assume that fewer background processes automatically provides a better everyday experience.
When to escalate: Refer to device-specific or application-development documentation when performing targeted background-process testing.
Common Mistakes
- Enabling many Developer Options simultaneously without understanding what each setting changes.
- Assuming lower animation scales increase the phone's actual processor or hardware performance.
- Leaving USB debugging enabled even though no development or debugging workflow requires it.
- Assuming Force Dark provides the same result as an application's native dark theme.
- Assuming Force Dark works correctly with every Android application.
- Setting an aggressive Background Process Limit without understanding its effect on application behaviour.
- Following a menu path from another manufacturer and assuming every Android phone uses the same Settings structure.
- Changing advanced options simply because they are available.
Key Takeaways
- On Android 4.2 and higher, Developer Options is generally enabled by finding Build Number and tapping it seven times.
- Developer Options menu locations and available settings can vary by Android version and manufacturer.
- Samsung documents the path Settings > About phone > Software information > Build number for supported Galaxy devices.
- Lower animation scales result in faster animation playback and can make the interface feel quicker.
- Animation-scale changes do not increase the phone's underlying hardware performance.
- USB debugging is intended for supported development and debugging workflows.
- Android 10 introduced Force Dark, but compatibility depends on application and theme configuration.
- Background Process Limit controls how many processes can run in the background at one time.
- There is no single Background Process Limit value officially recommended for every Android user.
- Change Developer Options individually and only when you understand their purpose.
Important Warnings
- Developer Options contains advanced controls intended primarily for application development, debugging and testing.
- Available Developer Options and their locations can differ between Android versions, manufacturers and devices.
- Animation-scale changes affect animation playback rather than actual processor or hardware performance.
- USB debugging should be enabled only when required for a specific development or debugging workflow.
- Force Dark does not guarantee correct rendering in every application.
- Restricting background processes can change application behaviour, so Background Process Limit should not be treated as a universal battery or performance optimisation.
Useful Tips
- Change only one Developer Option at a time so you can identify its effect.
- Remember the previous value before modifying an advanced setting.
- Try 0.5x animation scales first if your goal is simply shorter interface animations.
- Use native application dark themes instead of Force Dark whenever possible.
- Keep USB debugging disabled unless a specific development or troubleshooting workflow requires it.
- Leave Background Process Limit at normal behaviour unless you have a clear reason to test process restrictions.
- Use official Android or manufacturer documentation when your device's Settings path differs.
Conclusion
Android Developer Options is most useful when you enable or change a setting for a clear reason. On Android 4.2 and later, the menu is generally unlocked by locating Build Number and tapping it seven times, although the exact path varies by manufacturer. If you want a faster-feeling interface, lower animation scales can shorten transitions without increasing CPU, RAM or storage performance. USB debugging is for supported development and troubleshooting workflows, Force Dark is a compatibility feature rather than guaranteed app-wide dark mode, and Background Process Limit is primarily useful for controlled testing. Change one setting at a time, record the original value and restore testing-only options when you no longer need them.
Frequently Asked Questions
How do I enable Developer Options on Android?
On Android 4.2 and higher, locate Build Number in Settings and tap it seven times. Complete screen-lock authentication if requested. The exact location of Build Number and Developer Options can vary by manufacturer and Android version.
Where is Build Number on Samsung Galaxy phones?
Google and Samsung document the path for supported modern Galaxy devices as Settings > About phone > Software information > Build number. Tap Build number seven times to enable Developer Options.
Does setting animation scale to 0.5x make Android faster?
A lower animation scale makes animations play faster, which can make Android feel more responsive. It does not increase CPU, RAM, storage or other underlying hardware performance.
Should I leave USB debugging enabled?
USB debugging is intended for development and debugging workflows. Enable it when a specific supported tool or procedure requires debugging communication with your phone rather than treating it as a general performance setting.
Does Force Dark work on every Android app?
No universal compatibility should be assumed. Android documentation explains that applications and themes can control whether Force Dark is applied. Apps using appropriate native dark or DayNight themes may not use Force Dark.
What does Background Process Limit do?
It sets the number of processes that Android allows to run in the background at one time. Google documents the feature but does not prescribe one universal value for every Android phone or user.
Should I reduce Background Process Limit to save battery?
Background Process Limit is primarily useful as a development and testing control. Restricting processes can affect application behaviour, and Android does not document one universal value as a recommended everyday battery optimisation.
Are all Developer Options performance tweaks?
No. Developer Options contains debugging, testing, graphics, monitoring, input, networking and application-behaviour controls. Many options are designed to help developers diagnose and test software rather than improve everyday phone performance.
Recommended Deals
Related Reading on Godealio
More Guide Details
Thumbnail Prompt
Professional technology thumbnail showing a generic Android smartphone with a Developer Options interface and subtle animation, USB, dark-mode and process-control symbols. No manufacturer logos, pricing or fabricated specifications.
Featured
false